In this post I would like to talk about Tables in the Homebrewery because not only are they useful in homebrews but also because of how the Homebrewery takes a few steps outside of conventional Markdown with a custom extension of the table syntax. I’ll start with the most basic of tables using standard Markdown syntax, and then go into the extended Markdown syntax created for the Homebrewery. In a second post, I’ll take a look at how to style tables with CSS.
Written for v3 renderer, Homebrewery version 3.6.
Basic Tables
Markdown makes simple tables easy to write and read, keeping in line with Markdown’s goal of allowing writers to quickly put out lightly styled page elements in a straightforward way without needing to dive deep into code. A basic table in Markdown consists of two parts, and the simplest table can be written with three lines of text:
| Header 1 | Header 2 |
|----------|----------|
| Body 1 | Body 2 |The first row will always be the header, the second is the ‘divider’, and the third row and any that come after it will be the body of your table. The columns are denoted by the | pipe character. Each successive body row follows the same format:
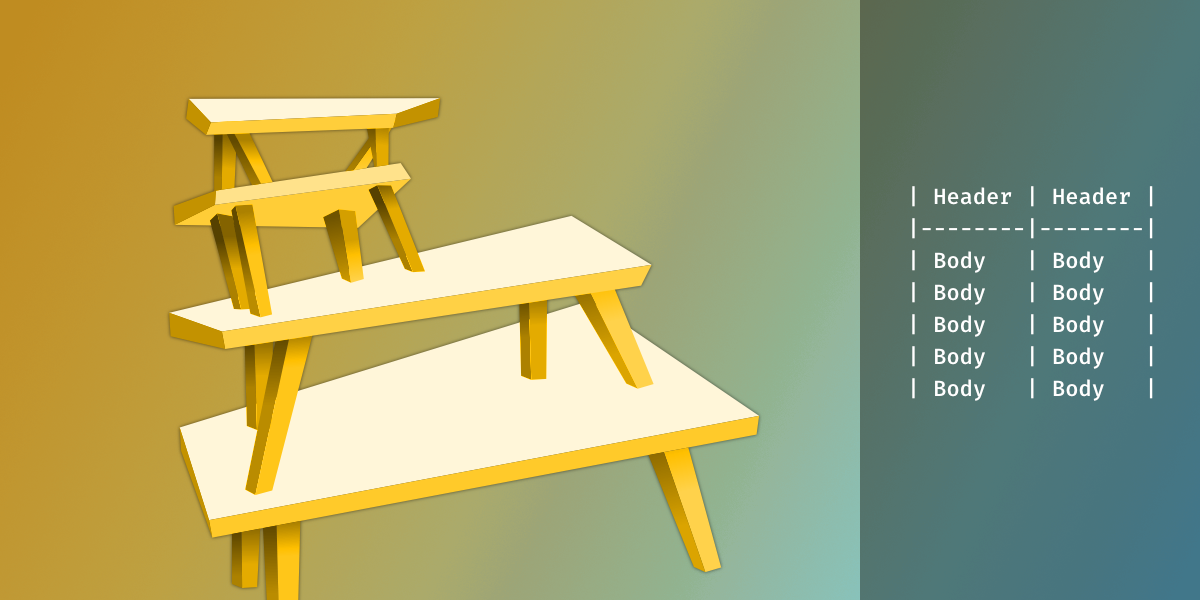
| Header 1 | Header 2 |
|----------|----------|
| Body 1   | Body 2   |
| Body 3   | Body 4   |
| Body 5 | Body 6 |When used in a Markdown to HTML editor like the Homebrewery, the output in HTML is going to look like this:
<table>
<thead>
  <tr>
    <th>Header 1</th>
    <th>Header 2</th>
  </tr>
</thead>
<tbody>
  <tr>
    <td>Body 1</td>
    <td>Body 2</td>
  </tr>
  <tr>
    <td>Body 3</td>
    <td>Body 4</td>
  </tr>
  <tr>
    <td>Body 5</td>
    <td>Body 6</td>
  </tr>
</tbody>
</table>The benefit to using Markdown should be obvious: the Markdown syntax is significantly cleaner and easier to read, particularly in the sense that you can see the columns better. Both describe the same table which looks like this in the Homebrewery (with the PHB theme applied):

That’s a pretty good table for the little syntax used to describe it. The headers are centered and bold, the rows have an alternating color, and the columns are evenly sized, all with just the basic structural behavior of Markdown tables and Homebrewery’s styling.
At this point I need to draw a distinction between the structure of a table and its styling. The structure of the table relates to the number of columns, number of rows, how those are divided into headers and data cells, the placement of those headers on the top or side, etc. The styling dictates the fonts, colors, and spacing within the table and is taken care of with CSS.
I’m going to start by talking about how to customize the structural part of tables, and then conclude with more information about the styling later in a second post. However, there is one more little thing that is possible with the very basic Markdown table syntax that I should point out before continuing: It is possible to change the horizontal text alignment in columns without using CSS or fancy Markdown extensions. To do this, place a colon (:) in the appropriate place:
| Left Aligned | Centered | Right Aligned |
|:-------------|:--------:|--------------:|
| Body         | Body     | Body          |
| Body         | Body     | Body          |
| Body | Body | Body |Note that you do not have to line the pipes up, and that you do not need to align your text to the right side of the column in order to have it appear aligned to the right. The table above will appear exactly the same as the table below:
| Left Aligned | Centered | Right Aligned |
|:---|:---:|---:|
| Body | Body | Body |
| Body | Body | Body |
| Body | Body | Body |Extended Table Syntax
Markdown table syntax is great for quickly throwing together a basic table with straight rows and columns, but the convenience comes at the cost of severely limiting the structure of the table. There is no method with regular Markdown to create a cell that spans two columns or two rows, which is actually a fairly common thing to do. For an example related to the Homebrewery, take a look at the typical Class table from the 5e Players Handbook:

The Class table for the Bard has a complex header, with an apparent single row showing everything from “Level” to an array of spell slots per level (“1st”, “2nd”, etc) and then additional header above those (“Spell Slots per Spell Level”). A standard Markdown table does not have any available syntax to include that last portion— “Spell Slots per Spell Level” is spanning 9 columns, and the earlier headers may even be spanning rows as well:

To create such a table in the past typically required the use of straight HTML or just leaving off the Spells Slots per Spell Level label entirely. Straight HTML would work fine using tag attributes col-span and row-span, but it would be nice to just have a slightly more robust Markdown-like syntax. And that line of thought led to the Marked.js marked-extended-tables extension mostly created by /u/calculuschild for the Homebrewery. With this custom extension of the table syntax, it is entirely possible to create a true Class table with a few more symbols.
Row Span
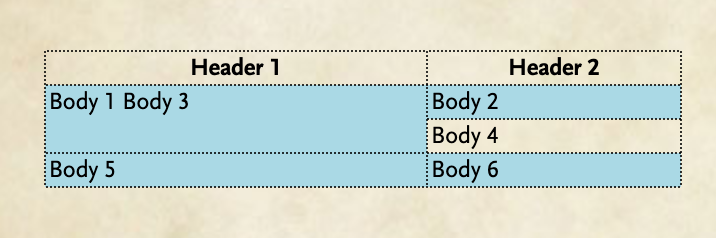
To span rows like the blue section of the previous overlay, use the ^ symbol at the very end of a cell to have it “merged” up into the cell above it. Any content inside that cell will be appended to any content in the cell it is merging into. For example:
| Header 1 | Header 2 |
|----------|----------|
| Body 1   | Body 2   |
| Body 3  ^| Body 4   |
| Body 5 | Body 6 |The cell “Body 3” will be merged up into “Body 1” and the text in the final cell will be “Body 1 Body 3”. With some extra styling for clarity, the result:
Column Span
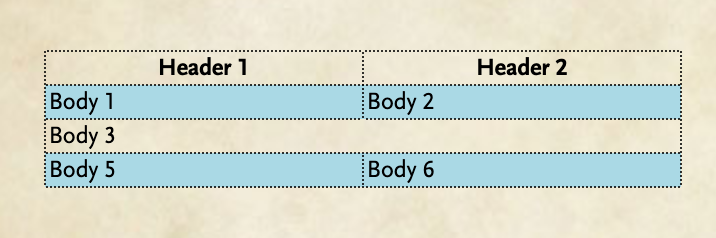
To have a cell cut across multiple columns, as in the green area on the previous overlay example, you will need to adjust the | pipe dividers on your row. When you span a cell to the next cell tell yourself you are also ‘removing’ a cell in the row— push the divider at the end of one cell until it bumps into the next divider. An example makes this easier to see:
| Header 1 | Header 2 |
|----------|----------|
| Body 1   | Body 2   |
| Body 3             ||
| Body 5 | Body 6 |In the above I have “removed” the cell “Body 4” and extended “Body 3” to span both columns. Note that specifically what is required is that the two pipe characters are adjacent (no space)….all of the filler spaces between the text “Body 3” and the pipes is not needed if I don’t want it but it does make it more clear. Here is the result:
Combining Row and Column Spans
Here is where we can pull it all together, using both row and column spans to create our class table. I have put both the code and a screenshot of the code below as it’s a pretty wide table and seeing the image may be easier if you have a smaller screen. But just note that the header is comprised of two rows, and the first 5 column headers are spanned across those two rows. Then, the last 9 columns have one header on top for “Spell Slots per Spell Level” followed by many pipe characters so that it spans all 9 columns, and secondary headers below that.
| Level | Proficiency | Features     | Cantrips | Spells | --- Spell Slots Per Spell Level ---|||||||||
|      ^| Bonus      ^|             ^| Known   ^| Known ^|1st |2nd |3rd |4th |5th |6th |7th |8th |9th |
|:-----:|:-----------:|:-------------|:--------:|:------:|:--:|:--:|:--:|:--:|:--:|:--:|:--:|:--:|:--:|
|  1st  | +2 | Hermetic Geography    |    3     |   1    | 2  | —  | —  | —  | —  | —  | —  | —  | —  |
|  2nd  | +2 | Gunpowder Torturer    |    4     |   1    | 2  | —  | —  | —  | —  | —  | —  | —  | —  |

The above is fairly complex to just look at and would be difficult to throw together quickly from scratch. Fortunately, the Homebrewery offers a few different tables as pre-made snippets in the editor menu “Tables”. You can generate a full Class table or 1/2 and 1/3 class tables, in addition to basic tables. In the end, though, the extended table syntax saves you from doing this in HTML:
<table>
<thead>
  <tr>
    <th rowspan="2">Level </th>
    <th rowspan="2">Proficiency Bonus      </th>
    <th rowspan="2">Features </th>
    <th rowspan="2">Cantrips Known   </th>
    <th rowspan="2">Spells Known </th>
    <th colspan="9">— Spell Slots Per Spell Level —</th>
  </tr>
  <tr>
    <th>1st</th>
    <th>2nd</th>
    <th>3rd</th>
    <th>4th</th>
    <th>5th</th>
    <th>6th</th>
    <th>7th</th>
    <th>8th</th>
    <th>9th</th>
  </tr>
</thead>
<tbody>
  <tr>
    <td>1st</td>
    <td>+2</td>
    <td>Hermetic Geography</td>
    <td>3</td>
    <td>1</td>
    <td>2</td>
    <td>—</td>
    <td>—</td>
    <td>—</td>
    <td>—</td>
    <td>—</td>
    <td>—</td>
    <td>—</td>
    <td>—</td>
  </tr>
  <tr>
    <td>2nd</td>
    <td>+2</td>
    <td>Gunpowder Torturer</td>
    <td>4</td>
    <td>1</td>
    <td>2</td>
    <td>—</td>
    <td>—</td>
    <td>—</td>
    <td>—</td>
    <td>—</td>
    <td>—</td>
    <td>—</td>
    <td>—</td>
  </tr>
</tbody>
</table>Honestly, doesn’t look too bad to write, but keeping it organized is another thing as you start to add your own content.
TablesGenerator.com
In this post I only covered the structural aspect of tables and how the Homebrewery offers a way to go beyond the normal restrictions of Markdown tables using a custom syntax extension. I did not get to cover how to style tables, but will cover that in a future post.
I’d like to add a link to another resource here at the end, though, which was a big help to me for a long time when dealing with tables: TablesGenerator.com. TablesGenerator offers a very basic visual interface for creating tables in a few languages, including Markdown and HTML. Using an “MS Excel”-like interface, you can create your tables by tabbing through cells, import tables from other sources, save them such as for templates, etc. The tables here are limited to the basic restrictions of their language, though– you will not be able to create Homebrewery-style Markdown class tables with row and column spanning, though you can do with the HTML table generator.
My recommendation for creating class tables is to use TablesGenerator.com/markdown_tables to create a basic Markdown table, with 14 columns and 21 rows. Use the first row for your headers, ignoring the “Spell Slots per Spell Level” portion for now. Fill in all your information using the nice UI. Then, “Generate” your table and paste into Homebrewery, and copy/paste the fancy headers from the pre-made snippets into your new table.
Here is a template file that you can download, and then upload to TablesGenerator.com from the File menu and you will be well on your way:
Markdown tables can be intimidating when you first come across them, but they do a lot of heavy lifting by providing a lot of information in a condensed format. If you find that a table looks completely mangled when viewing it in the Editor, try expanding the editor to a greater width so that the rows are broken across more than one line in the Editor.
Hopefully this post has provided the guidance needed to understand complex tables, and tools to help make your own. Watch for a second post about how to give your tables some style with alternating row or column colors, highlighting cells, and more.